Around the end of Februar 2016 prints with our trusty only 11 months old TAZ4 3D Printer started to fail. Specifically the extruder just stopped extruding mid-print, while everything else was working along as if nothing had happened.
After some investigation, we discovered the problem, the extruder stepper motor was getting waaayyy tooo hot. Each time, about 10 to 15 minutes into a print, the extruder/feed stepper would reach 91°C and just stop moving. As no more filament was being extruded, prints were getting ruined.
Fixing It – First Attempts
First I ran a print with the filament removed, the filament tension mount relaxed in order to reduce any resistance the stepper might encounter. Still it overheated. Obviously we tried attaching a heatsink, but of course that just bought a few extra minutes.
My first idea was to trim the micropotis on the controller board and reduce the motorcurrent. Alas, there were no potis to be found. Then equinox suggested it might be a mechanical problem since everything was working fine the last eleven months.
So we took the extruder apart twice. Second time around an hour later, we discovered that the M10 nut of the bolt conveying the filament which has the big cog on it’s other side, was way too tight. Presumably someone wanted to improve things by tightening the screw.
The result being, that the washer pressed on the bearing and put the brakes on the extruder motor.
Additionally I discovered that the screw afixing the steppershaft to the PLA cogwheel was loose. Possibly the hot motor softened the PLA enough for the shaft to slip through and cause the motor to turn by itself.
Sadly, none of these fixed solved our problem. Our NEMA17 still overheated, with 90°C being far outside it’s absolute maximum rating of 60°C (Specs) and even further away from the 42°C operating temperature reported on the internet.
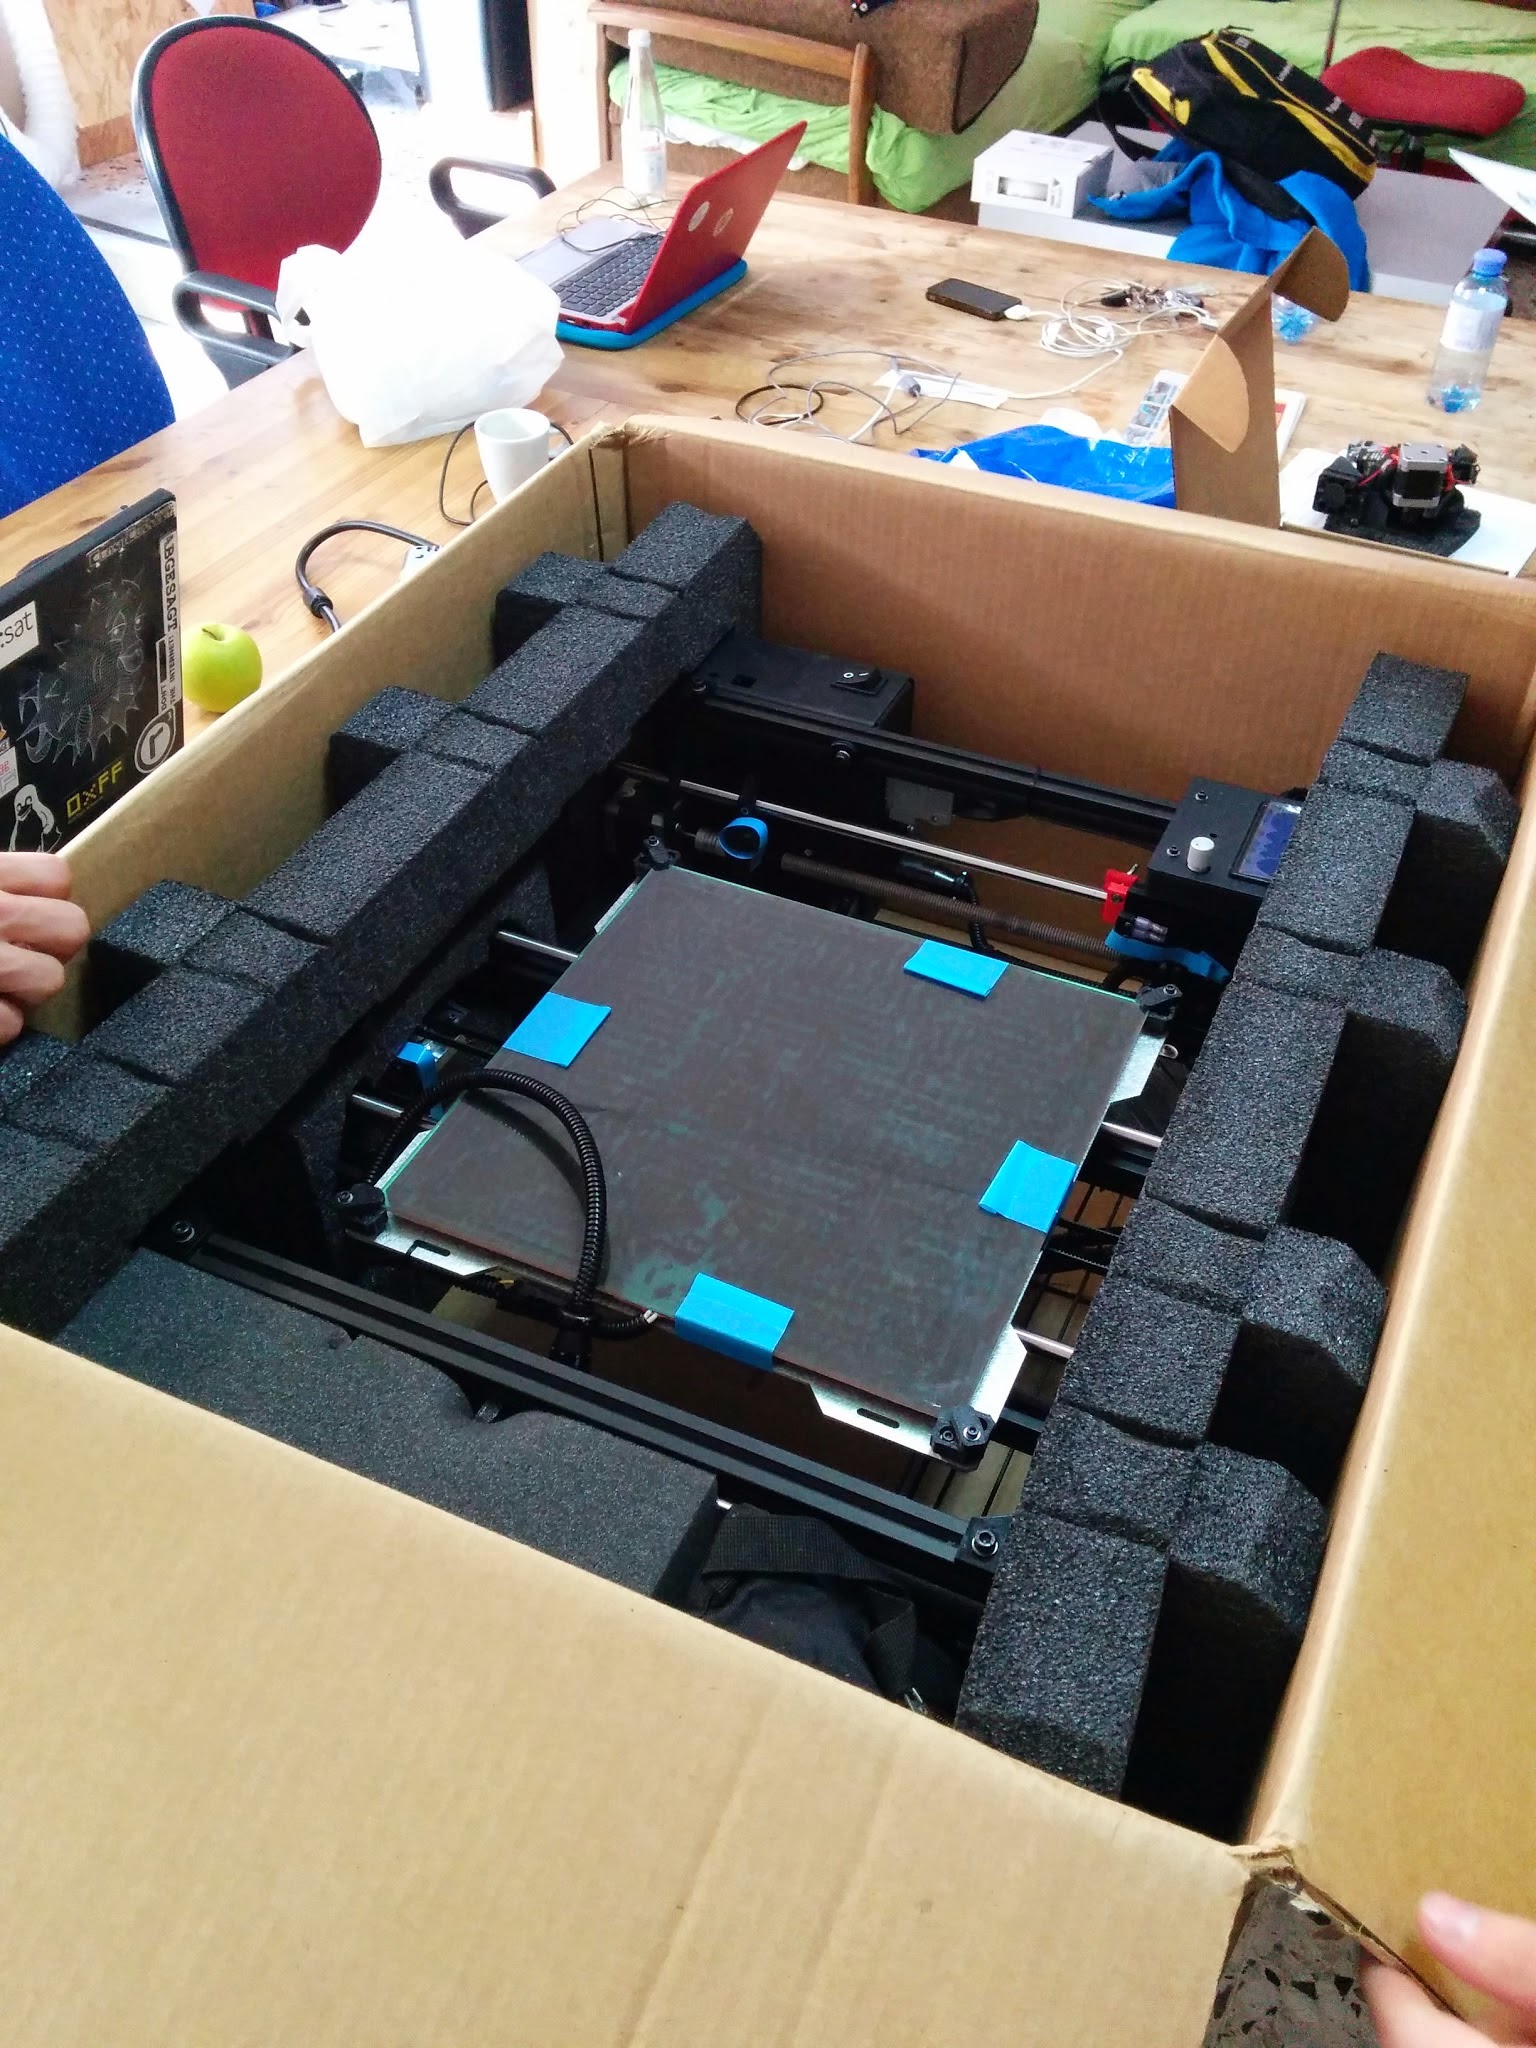
Thursday we unboxed our highly anticipated TAZ4 #3DPrinter, which we won as part of the #LulzBot 4th Annual Hackerspace Giveaway.
Unboxing
It rulez !!
We have a very coloured history when it comes to 3D printing. Ever since we ordered the first parts for our self-built RepRap Mendel years ago, 3D printing was something you did not mention easily at realraum.
The RepRap was built, rebuilt, adjusted, taken apart, modified and hacked, again and again. All with mixed success. While we did learn a lot about 3D printers in the process, likely spent more than 300 man hours on it and even wrote a big TeaCup firmware patch, the thing probably only ever spent a sum total of 2 weeks out of 5 years in a state where it could actually print, badly! Most of the time however, nobody knew who last took apart what or was planning to improve which thing next.
Then came the MakiBox. Co-sponsored by one of our founding members (who resided in Hong-Kong at the time and co-founded DimSumLabs there) Always on a tight budget, this first-of-the-line production model seemed the perfect way to finally make 3D printing a reality here at realraum. Especially since said founding member was sponsoring it. In its defence can be said, that, frail as the design was, it did actually print in the beginning. Unfortunately that state would not hold very long. We then decided not to review the MakiBox, as we were missing the words to describe just how crappy it really was.
Again, 3D printing was not mentioned at realraum for about a year.
Finally, along comes the Lulzbot TAZ4.
After just a few days it may be a bit much to say “Lulzbot rescued 3D printing for us”, but that’s about what it feels like right now.
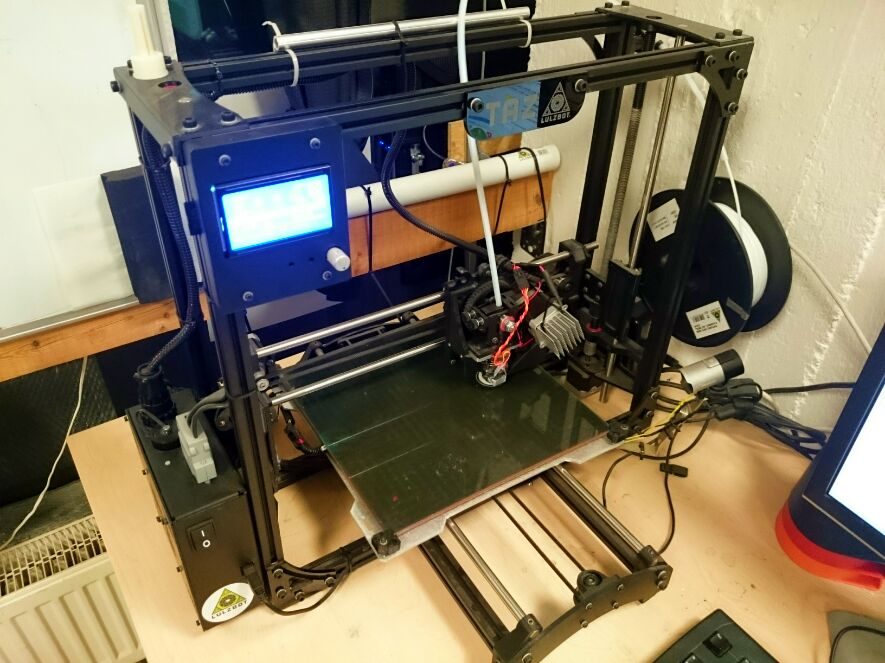
It has a large print area and is capable of very fine and precise prints. It follows all best-practices I’ve ever read about making 3D printers. E.g. it has a heated glass-surface which is perfect for PLA. Beyond that, you might even accuse Lulzbot of over-engineering. Looking at the industrial grade cable connectors, screws, bearings and shaft couplings, you know they didn’t skimp on the parts. Next to that is ships with a bag of quality tools which even includes a jar for mixing ABS and Acetone.
comes with ALL the tools
Our first test prints came out very well. Even when stress-testing with our crappy old PLA roll, the prints came out very nice. The nice fan and air-guide works just as expected and overhangs printed without problems. Using rafts, even delicate and complex prints with little surface area came out fine.
To show off the printing process (and experiment with gstreamer), we mounted a webcam on the platform, the resulting time-lapse videos can be found in the gallery.
It does have its hard edges, but this printer is not meant to be super-user-friendly and DAU-resistant. Instead it is hackable, open-source and a precise straight-forward work-horse. Just how we like it! Despite our hack-at-it attitude, we _did_ appreciated the big and surprisingly useful user-manual as well as the handy illustrated first-steps flyer.
and ALL the instructions ;-)
All in all, the printer gives manages be at once a highly professional machine as well as a matured hackable open source project.
Of course, it would not be bitchy us, if we didn’t find anything that could be improved. Most of that can be traced to the firmware: The sampling of the rotary encoder for once feels sluggish and imprecise even though the encoder itself is high-quality. We also wonder if the forces reset on sd-card change and usb-cable plugin is really necessary. Finally, it’s OK that the printer does not print from SDcard when still connected by USB, but it could display a warning instead of just plainly doing nothing after one selects “start”. Also the resonance frequencies of the printer could have been measured and the firmware modified so it would then avoid certain of those speeds and direction changes. Since it’s all just software, we may actually do something about that in the future On the hardware side, we noticed that the power supply’s cooling fan would still run long (hours) after the printer had been switched off. (Note: the only big off switch is on the DC voltage side of the printer). Not sure if that fan actually ever stops.
All that (and on the bitchy side: the fact that it’s just that) really really shows just how much experience and know-how (hard won over the years of DIY 3D printing I’m sure) went into making the TAZ 3D Printer. Thanks #LuzlBot !!
first success with PLA: enclosure for our biohazard alcohol breath-o-meterBiohazard Breath-o-Meter