Not long after realraum moved to it’s current premises, we knew we wanted a curtain in the front windows, just like in the old realraum. Not only to better use the beamer during the day, but also to keep the room cooler in the summer and have a tiny bit more insulation in the winter. There was also hope of it dampening echos and loud noises.
That was about 2 years ago.
But how to hang the curtain. The ceiling after all, does not bear any loads. The search for a solution that would allow us to move the curtain freely over the ranges of a 4 and 5 meter wide front window began. The old curtains were both too short and not enough. Where to get nice looking fabric cheap, that is both fire retardant and thick enough to insulate was also an open question. Of course such fabric would be heavy and did I mention the ceiling does not bear any loads.
Now enter a handful of engineers with dwindling spare time, different opinions and varying expertise into the mix and you may begin to see what took so long.
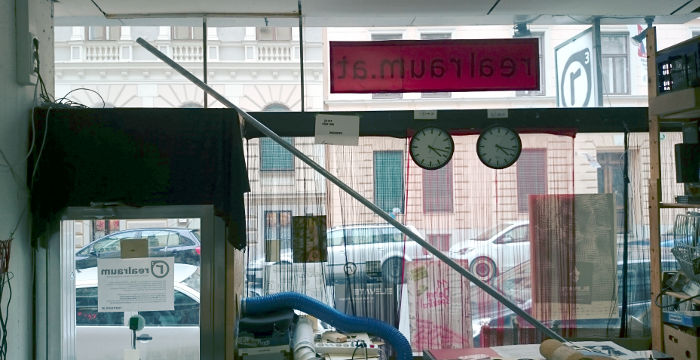
Quite early, we agreed that spanning two extremely sturdy pipes from one wall to the column to the other wall was the solution to go with. Eventually Christoph procured one for us which was a bit thicker than anticipated. Somewhen, frequent visitor and hobby seamstress Sasa managed to get us between 200 and 300 m² of great fabric for a bit over a 100 Euros. Thank you Sasa for making them into curtains and even putting in the eyelets.
Some very motivated members promised to mount the pipe but went to work more quickly than anyone had anticipated. Miscommunication happened, some mistakes were made. Finally we re-mounted the pipe three times.
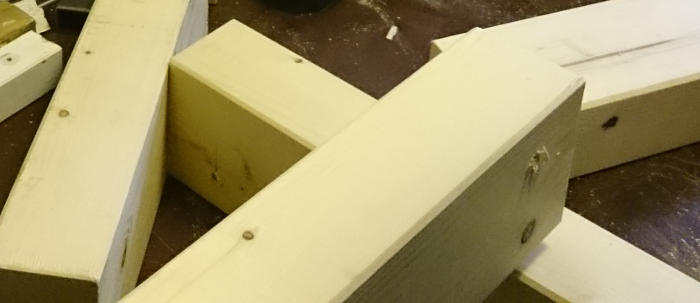
The first attempt had to go because the wood holding up the load was too thin. Instead of the planned U-cut to hold the pipe, an easy V-cut was made. The pressure exuded on the panel in direction of the fibres caused the wood to crack pretty early on. Then, instead of moving away the cable conduit (which later, turned out to be really easy to do), a daring constructions of wooden distance holders bridge was built in order to mount the pipe-holing-wood on top of the cable conduit. While not very tidy, the real problem here was that the screws were too long for the holes drilled. (Understand: were talking about a massive and solid concrete column holding up the whole house. Even with the right equipment that doesn’t drill easily). Consequently there was an air-gap between the column and the wood holding up the pipe. As we all remembered that day: screws hold stuff in place by way of static friction, i.e. pressing one material onto another e.g.. by pressing a piece of wood against a wall. They are not meant to withstand orthogonal forces and do not like to bear loads that way. Christian was the first to spot the air-gap. Exasperation and learning followed
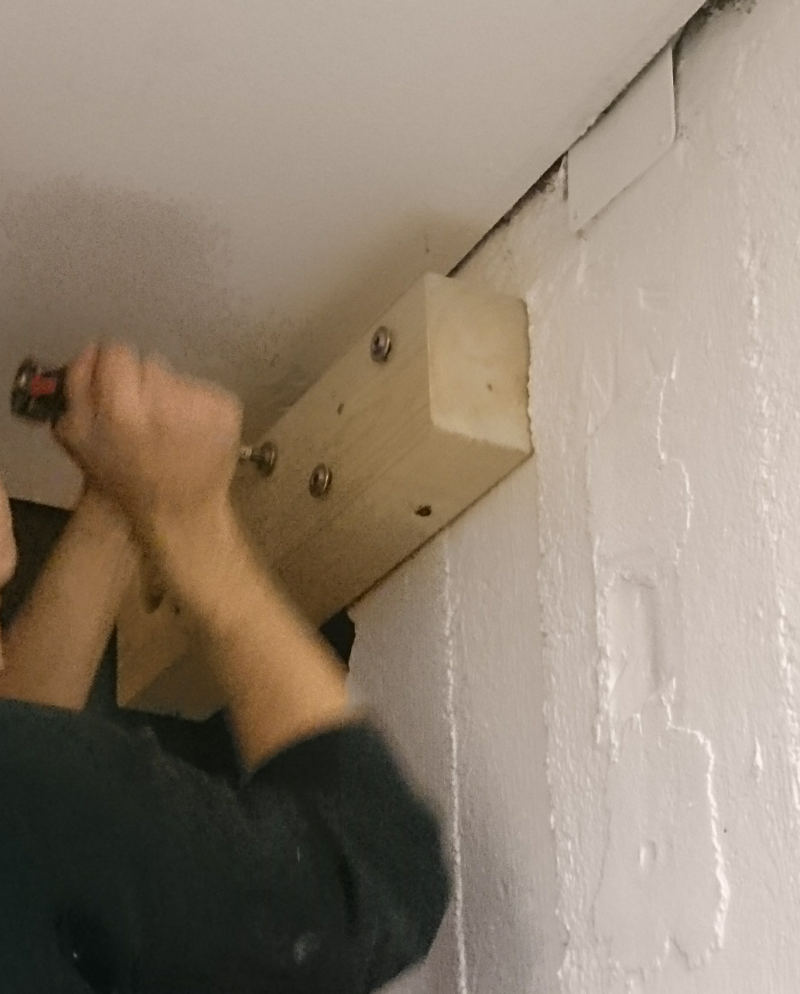
Eventually, the sturdy, thicker than what your normal hardwarestore sells, wood we wanted to use in the first place appeared and the pipe-holders got completely redone. Sturdy enough to hang a small car on it. Or, you know.. a curtain and some people that might stumble into it during a party. Gotta plan for everything.
Finally, the pipe was not sufficiently secured against longitudinal movement. Meaning the direction in which you would pull when you move the curtain. Too much and the strings holding it in place might rip and crash everything down. Thankfully Christian also finally drilled holes at the ends and secured them with bolts across and through the pipe.
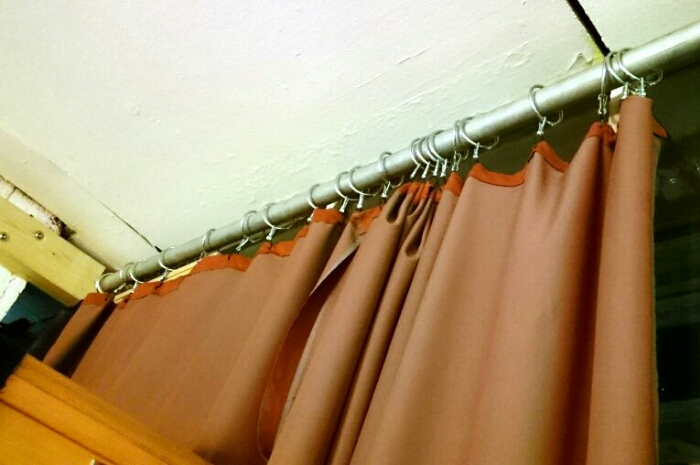
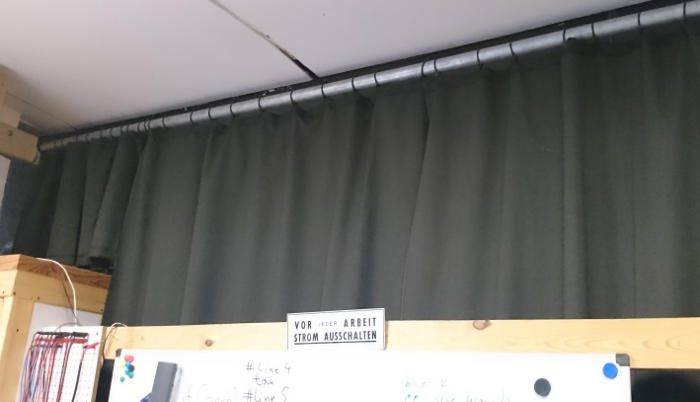
Don’t exhale yet, we’re not done. The curtain still had to be mounted, and guess what. Curtainrings that fit a 42mm diameter pipe are really really hard to get. We tried to make due (thanks to Sandra for all the work), it’s really hard to move a curtain that is hanging on 150 tightly bound zip ties. Eventually we found a German shop that sells big metal rings at a surprisingly reasonable price and ordered right away. I don’t even want to explain why it then took 3 months for them to arrive.
Yesterday, then, the long road had an end, the project finally got done. Our junior member David took up heart and down the pipes, replacing the zip-ties around the pipe with well moving (and sounding) metal rings.

So end of story. Finally. Or is it? Because we also ordered clips to hang the curtain from it’s eyelets to the rings. We ordered new eyelets with a bigger inner diameter because the clips would not fit in the very small ones we had when Sasa and Sandra put them in. (Never believe the online-shopping product description). Right now the curtain and the clips/rings are still connected with zip-ties. So the question remains… do we still care? Or did anybody even read all the way down?